Forms
Forms collect structured information from a lead. Publish a form as a public web page, or send it inside a WhatsApp conversation.
This section explains the following:
- To create a form
- To add and configure fields
- To map answers to lead fields
- To choose the form type
- To publish and share a form
- To review responses
- To export responses to Lead Studio
To create a form
-
Select Forms in the sidebar.
-
Select New form. The form builder opens on the Build tab.
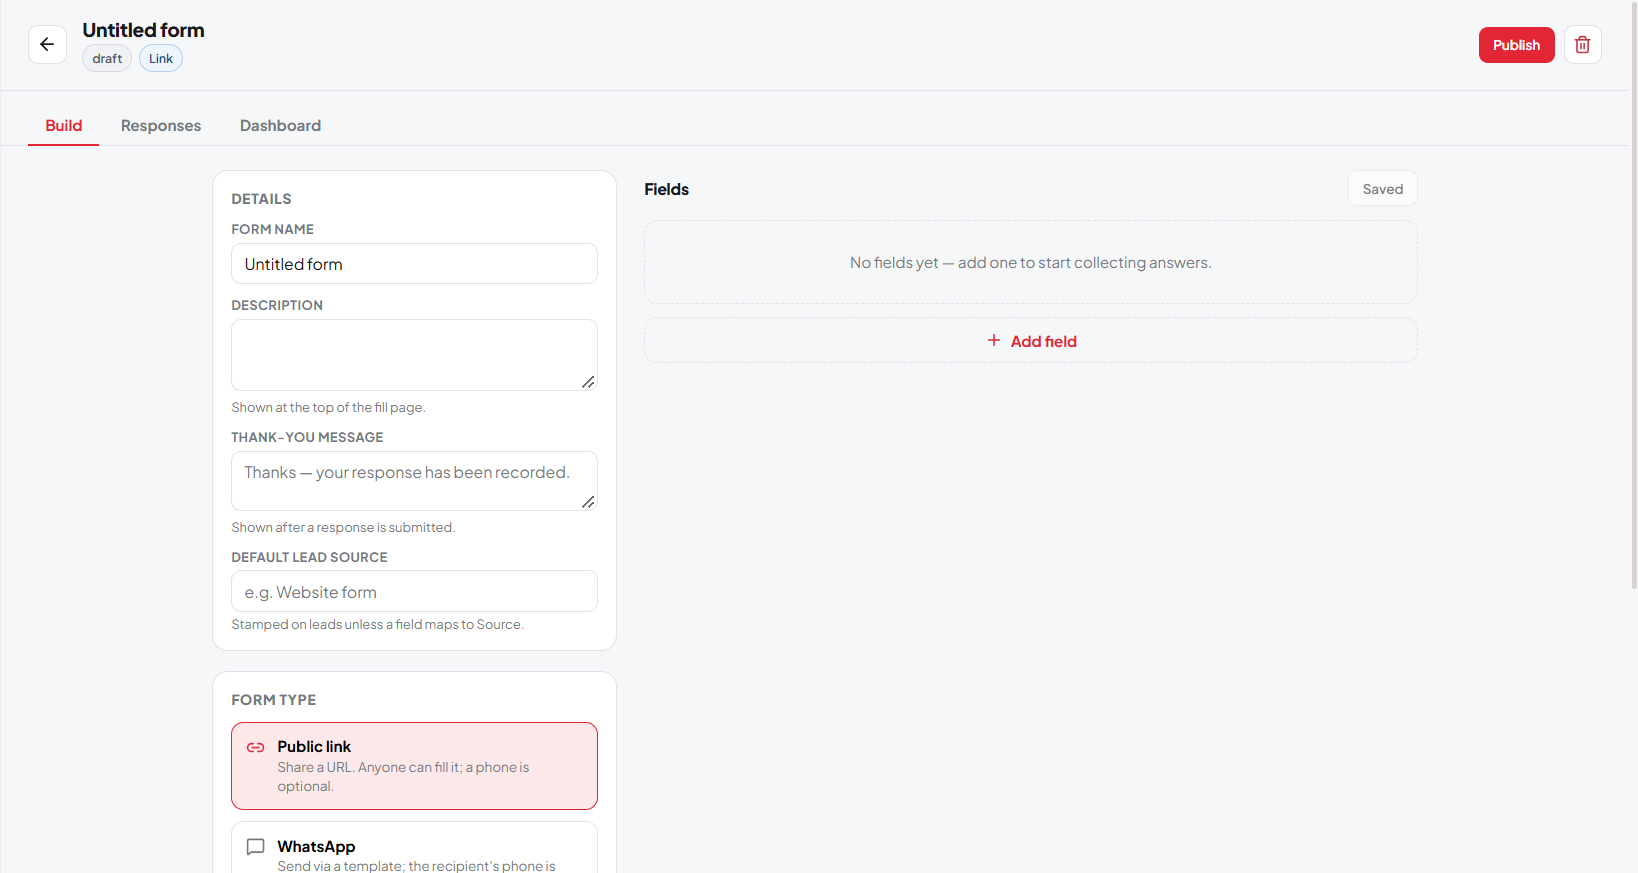 Figure 23. The form builder
 -
Under Details, fill in:
- The form title and description.
- Success message — what the respondent sees after they submit, for example
Thanks — your response has been recorded. - Default source — the lead source recorded for everyone who fills it in, for example
Website form.
-
Under Branding, set the colours and logo you want on the public page.
To add and configure fields
-
Select Add field.
-
Type the field label — the question the respondent sees.
-
Select the field type:
Type What the respondent does Short text Types one line. Paragraph Types several lines. Email Types an email address. Phone Types a phone number. Number Types a number. Date Picks a date. Dropdown Picks one option from a list. Single choice Picks one option from radio buttons. Multiple choice Picks any number of options. Yes / No Picks one of two. Rating Picks a score on a 3, 4, 5, or 10-point scale, with an optional comment. Section heading Nothing — this is a heading that groups the questions below it. -
For a choice field, type the options.
-
For a rating field, choose the scale and type a comment prompt, for example
Anything to add? -
Turn on Required for any question that must be answered.
-
To reorder fields, drag them. To remove one, select the remove icon.
To map answers to lead fields
Mapping writes an answer straight onto the contact record.
- On a field, select the Saves to box.
- Choose where the answer goes:
- Name
- Phone
- Lead source
- Any custom field you created
- Don't save to a column — the answer is stored with the response only
Tip: Always map a phone field. Without a phone number, the response can't become a WhatsApp contact.
To choose the form type
Under Form type, select one:
| Type | What happens |
|---|---|
| Public link | Zprox.Chat publishes the form at a public web address. Share the link anywhere. |
| The form is sent inside a WhatsApp conversation. Select the WhatsApp account that sends it, or choose the option that stores responses only. |
For the WhatsApp type, the Send inside WhatsApp panel shows the template the form uses and its approval status. The statuses are the same as in Understand template statuses.
To publish and share a form
- Select Save.
- Set the form status to Published.
- Copy the public link. It has the form
/f/<slug>. - Share the link on your website, in an ad, or in a message.
To stop accepting responses, set the status to Closed.
Note: The public form page needs no sign-in. Respondents never see your workspace.
To review responses
- Open the form.
- Select the Responses tab. Every submission appears as a row, one column per question.
- Select the Dashboard tab to see aggregated answers, such as choice counts and average ratings.
To export responses to Lead Studio
- On the Responses tab, select Export to Lead Studio.
- Select the WhatsApp account the contacts should belong to.
- Optionally select an existing group to apply, or create a new one by typing a name and choosing a category.
- Select Export. The responses become contacts in Lead Studio, matched on phone number so existing contacts are updated rather than duplicated.
Media library
The media library holds images, videos, audio, and documents that chats, AI agents, and templates can use. Media is stored per WhatsApp account.
This section explains the following:
To upload media
-
Select Media in the sidebar.
-
At the top, select the connected account the media belongs to.
-
Select Upload. The Upload Media dialog appears.
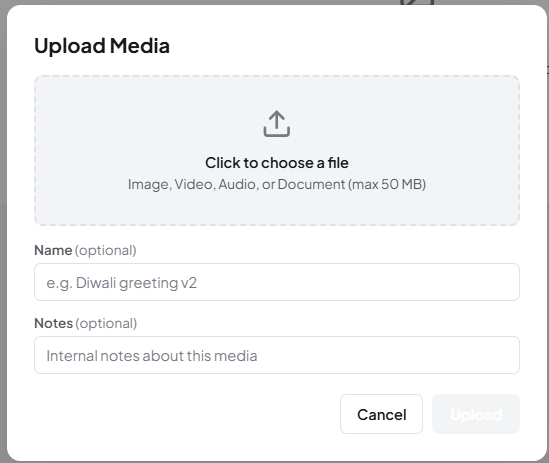 Figure 24. Upload media
 -
Choose the file, or drag it into the dialog.
-
In the name box, type a name you'll recognise, for example
Diwali greeting v2. -
In the notes box, type internal notes. This is optional.
-
Select Upload. The item appears in the library.
Understand sync status
Zprox.Chat uploads media to Meta so that WhatsApp can send it. Each item shows its sync state.
| Status | Meaning |
|---|---|
| Not synced | Stored in Zprox.Chat, not yet sent to Meta. |
| Syncing… | Upload to Meta in progress. |
| Synced | Ready to send on WhatsApp. |
| Failed | The upload to Meta failed. Try again, or check the account's token. |
| Expired | Meta's copy has expired. Zprox.Chat re-uploads it the next time you use it. |
To use or delete media
- In a chat: Select the library icon in the composer and pick the item. See To send a file, image, or voice message.
- In an AI agent: Add the item to a media group. See To give the agent media.
- To copy the media ID: Select the copy icon on the item. Use the ID in automations and API calls.
- To delete: Select the bin icon on the item and confirm.
Important: Deleting media that a template or agent still refers to causes those sends to fail.