Chats
Chats is the shared team inbox. WhatsApp and Instagram conversations arrive in the same place and update live.
This section explains the following:
- Understand the Chats layout
- To open a conversation
- To start a new chat
- To send a message
- To send a file, image, or voice message
- To send a template
- To send a form
- Understand the 24-hour messaging window
- To reply to a specific message
- To tag a contact from the chat
- To assign a conversation to a team member
- To take over from an AI agent
- To search messages
- To export a chat
- To use the contact details panel
Understand the Chats layout
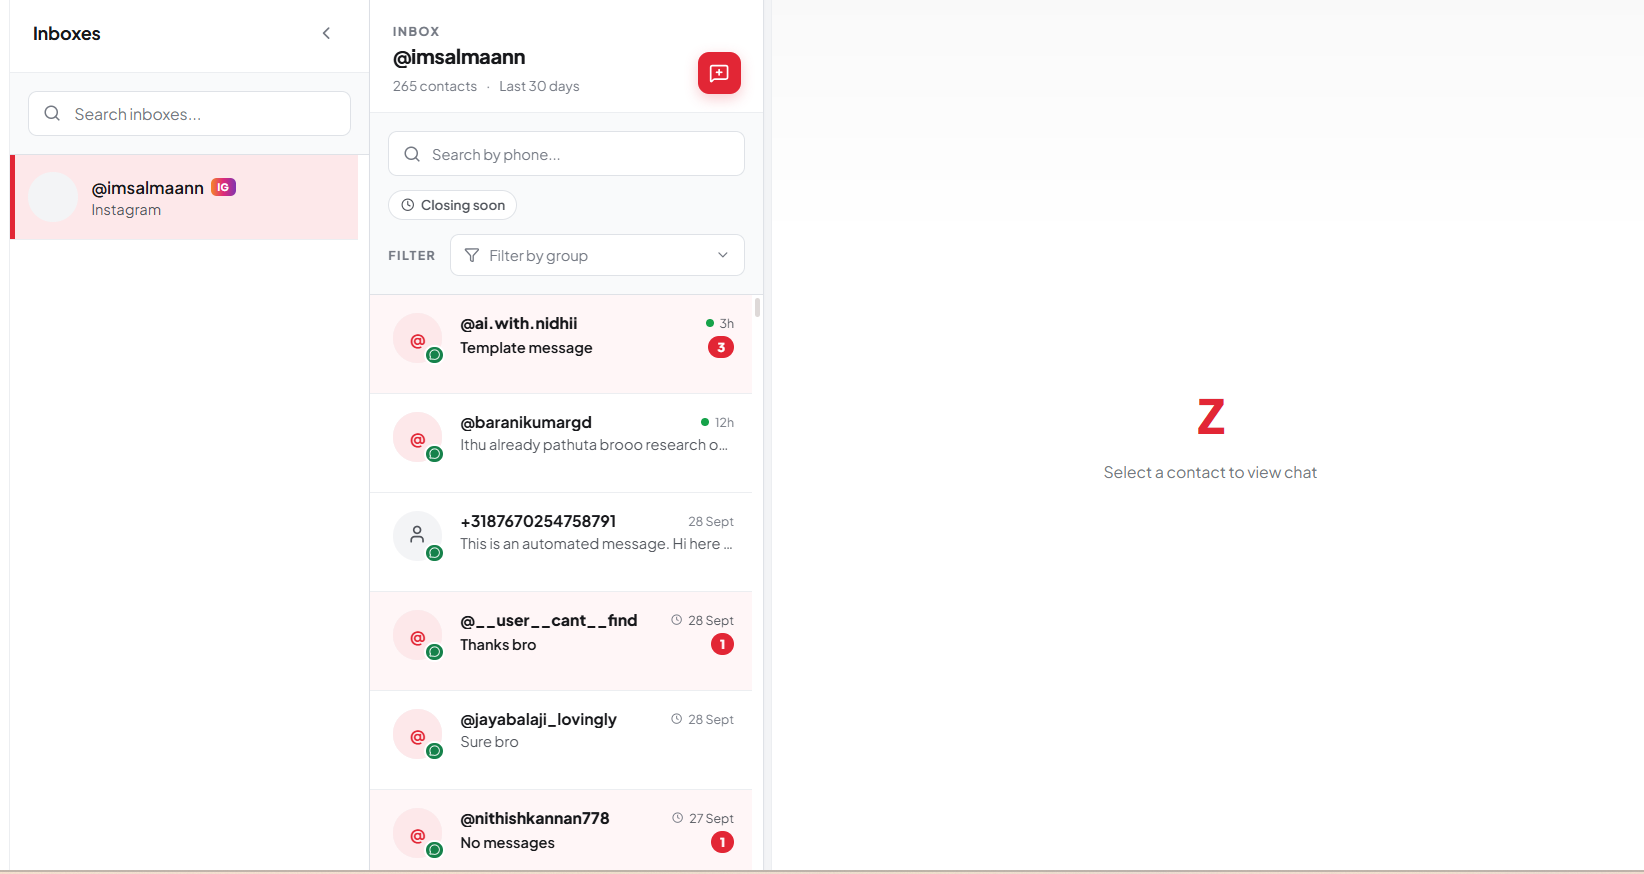 Figure 12. The Chats page
Chats has up to four panels, from left to right:
- Inboxes — every WhatsApp number and Instagram account you can access, each with its unread count. The panel opens when you enter Chats and collapses after you pick an inbox.
- Conversations — the conversation list for the selected inbox, newest activity first.
- Chat window — the message timeline and the composer.
- Contact details — the profile of the person you're chatting with. Optional.
To resize the conversation list: Drag the divider between the conversation list and the chat window.
To show or hide the contact details panel: In the chat header, select the panel icon.
Note: Zprox.Chat never puts phone numbers in the browser address bar. Deep links open the chat and then clean the URL.
To open a conversation
- Select Chats in the sidebar.
- In the Inboxes panel, select the WhatsApp number or Instagram account you want to work in. The panel collapses and the conversation list appears.
- Optionally narrow the list:
- In the Search by phone box, type part of a number.
- Under Filter, select Filter by group to show only contacts in a group.
- For Instagram, use the sort control to order conversations by how soon their reply window closes.
- Select a conversation. The chat opens and the conversation is marked as read.
Note: Zprox.Chat remembers the last inbox you used and reopens it next time, provided you still have access to it.
To start a new chat
Use this when you want to message a number that isn't in the conversation list yet.
-
At the top of the conversation list, select the new-chat icon. The New chat dialog appears.
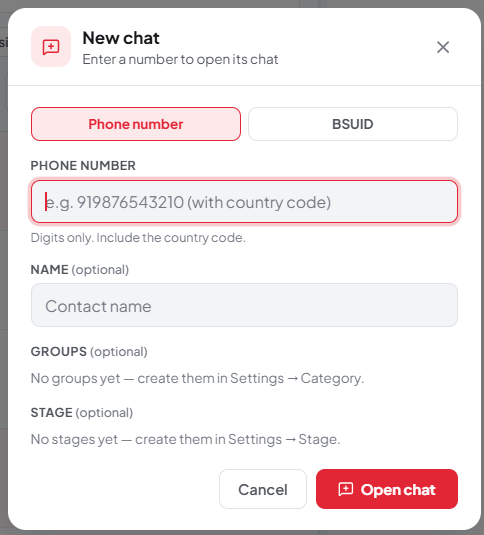 Figure 13. New chat
 -
In the Phone number box, type the number with its country code, for example
919876543210. -
In the Contact name box, type a name. This is optional.
-
Optionally select a category and groups, and a stage.
-
In the Message box, type your first message.
-
Select Send. Zprox.Chat creates the contact and opens the conversation.
Important: If the person has never messaged you, WhatsApp only accepts an approved template. Use Send a template instead of free text. See To send a template.
To send a message
-
Open the conversation.
-
Select the Type a message box and type your message.
-
Press Enter, or select the send icon.
Tip: Press Shift+Enter to start a new line without sending.
Note: If the box is unavailable, the 24-hour window has closed or the number isn't set up to send. See Understand the 24-hour messaging window.
To send a file, image, or voice message
To attach a file:
-
In the composer, select the paperclip icon, then choose a file.
You can also drag a file onto the chat window, or copy an image and press Ctrl+V.
-
In the Add a caption box, type a caption. This is optional.
-
Select the send icon.
To send from the media library:
- In the composer, select the library icon.
- Search for the item and select it.
- Select the send icon.
To record a voice message:
- In the composer, select the microphone icon. Recording starts and a timer appears.
- Speak your message.
- Select the stop icon to finish, or Cancel to discard it.
- Select the send icon.
Note: On Instagram, file attachments, the media library, and voice messages aren't available yet. The buttons are unavailable and explain why when you point at them.
To send a template
Send an approved template when the 24-hour window has closed, or when you're messaging someone for the first time.
-
In the composer, select the plus icon. A menu appears.
-
Select Send a template. The Send Template dialog appears.
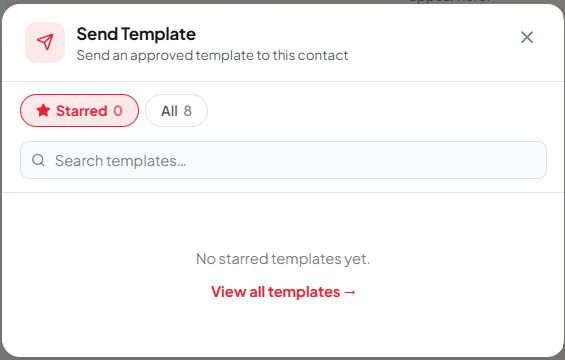 Figure 14. Send a template
 -
In the Search templates box, find the template you want. Only templates approved for this number appear.
-
Select the template. A preview appears.
-
Fill in a value for each variable the template uses.
-
Select Send.
Note: Sending a template to someone who hasn't messaged recently reopens the 24-hour window as soon as they reply.
To send a form
- In the composer, select the plus icon.
- Select Send a form.
- In the Search forms box, find the form you want.
- Select the form, then select Send. The contact receives a link that opens their own copy of the form.
Responses appear on the form's Responses tab. See To review responses.
Understand the 24-hour messaging window
WhatsApp and Instagram both limit when you can send a free-form message.
| Channel | Rule | What Zprox.Chat does when it closes |
|---|---|---|
| You can send free text only within 24 hours of the customer's last message. | The composer is disabled and reads Reply window closed — send a template instead. Use Send a template. | |
| The standard window is 24 hours. A human-agent reply extends your reach to 7 days. | The composer is disabled and a notice appears above it. Use the human-agent reply box, or wait for the customer to message again. |
Note: To avoid the window closing on an active lead, set up the 24-hour window reminder (To set up the 24-hour window reminder) and turn on Auto-remind for that conversation.
For the full policy, see https://faq.whatsapp.com/.
To reply to a specific message
- Point at the message you want to answer.
- Select the reply icon. The message appears as a quoted block above the composer.
- Type your reply and send it.
To cancel: Select the close icon on the quoted block.
To tag a contact from the chat
- In the chat header, select the tag icon. The Groups menu appears, organised by category.
- Select a group to apply it. Select it again to remove it.
- Select anywhere outside the menu to close it.
Note: A contact can hold only one group per category. Selecting a second group in the same category replaces the first.
To assign a conversation to a team member
Admin only.
- In the chat header, select the assign icon.
- Select the person who should own the conversation, or select Unassigned to clear the owner.
The assigned person sees the conversation in their inbox. Sales users only see conversations assigned to them.
To take over from an AI agent
When an AI agent is answering a conversation, a robot icon appears in the chat header with a green dot.
- Select the robot icon. The agent pauses and the dot turns amber. You now answer the conversation yourself.
- Select the icon again to hand the conversation back to the agent.
To search messages
- In the chat header, select the search icon.
- In the Search messages box, type what you're looking for. Matching messages are highlighted in the timeline.
- Select the close icon to leave search.
To export a chat
- In the chat header, select the more-options icon.
- Select Export chat. Zprox.Chat downloads the conversation as a file.
Note: Export chat is unavailable when the conversation has no messages.
To use the contact details panel
The panel on the right shows who you're talking to and what you know about them.
| Card | What it shows |
|---|---|
| Contact information | Name, channel, masked phone number, and email address. |
| Lead & ownership | Lifecycle stage, lead score, and the assigned team member. |
| Groups & labels | Every group applied to the contact. |
| Opt-out notice | Appears when the contact asked to stop automated messages. |
To edit the contact: In the chat header, select the pencil icon next to the name, or select More options > Contact info.
Important: If the panel shows that a contact opted out, don't message them with marketing content.
Lead Studio
Lead Studio is your contact database. Every person who messages you appears here, along with anyone you import.
This section explains the following:
- Understand the Lead Studio table
- To search, filter, and sort leads
- To choose which columns appear
- To open and edit a lead
- To manage groups
- To import leads
- To export leads
- To run bulk actions
- To broadcast to selected leads
Understand the Lead Studio table
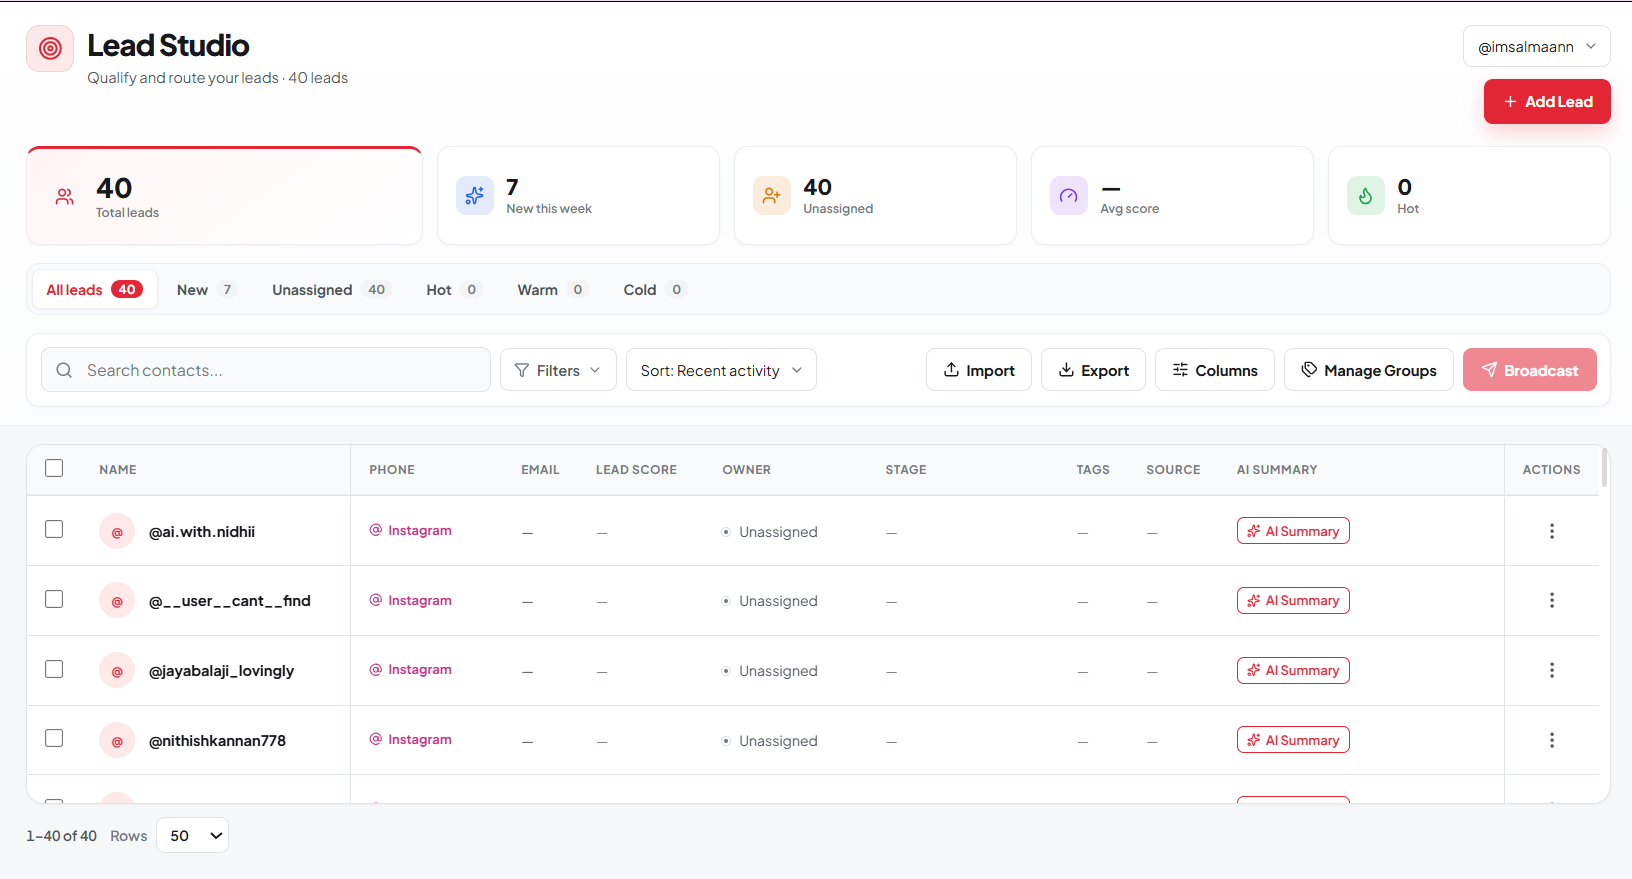 Figure 15. Lead Studio
At the top left, select the account box to choose which WhatsApp number or Instagram account you're looking at, or select the option that covers every channel.
The table can show these columns:
| Column | What it shows |
|---|---|
| Name | The contact's name. |
| Phone | The masked phone number, or an Instagram badge. |
| The contact's email address. | |
| Lead Score | A number and a temperature pill — hot, warm, or cold. Automations set this with the Update Lead Score action. |
| Owner | The assigned team member, or Unassigned. |
| Stage | The lifecycle stage. |
| Tags | Every group applied to the contact. |
| Source | Where the lead came from, according to Meta — for example a click-to-WhatsApp ad or a Facebook or Instagram post. Set automatically on the first message. |
| AI Summary | A short summary written by your AI agent when a conversation goes quiet. |
| Custom fields | One column per custom field you created in Settings > Fields. |
To search, filter, and sort leads
- In the Search contacts box, type a name, number, or email address.
- Select the filter control to narrow by group, stage, owner, or lead temperature.
- Select the sort box and choose one of:
- Sort: Recent activity
- Sort: Newest
- Sort: Lead score
- Sort: Name A–Z
- Sort: Owner
To choose which columns appear
- Select Columns.
- Turn columns on or off, and drag them to change their order.
- Close the panel. Your layout is remembered.
To open and edit a lead
- Select the lead's row. The contact drawer opens.
- Edit any field — name, email address, stage, owner, groups, or custom fields.
- Select Save.
To open the conversation: In the drawer, select the option to open the chat.
To manage groups
- Select Manage Groups. The group manager opens.
- Create, rename, recolour, or delete categories and groups without leaving Lead Studio.
- Close the manager. The table refreshes.
This is the same data you set up in Settings > Category. See To create categories and groups.
To import leads
You can import from a .csv file, an .xlsx file, or a Google Sheets link. The import runs as a three-step wizard.
-
Select Import. The Import Contacts dialog appears.
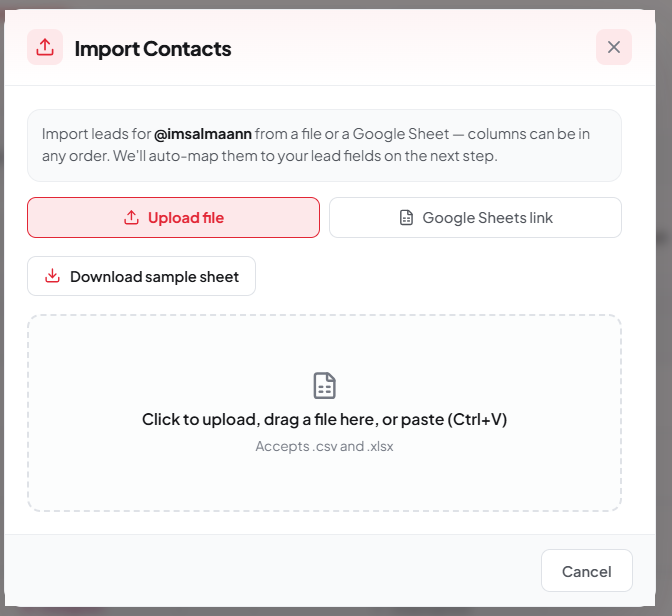 Figure 16. Import contacts
 -
Choose how to supply the data:
- File — select or drag a
.csvor.xlsxfile. - Sheet — paste a Google Sheets link.
Zprox.Chat reads the headers and shows a preview.
- File — select or drag a
-
On the mapping step, match each column in your file to a Zprox.Chat field. Zprox.Chat suggests a mapping for you. Set any column you don't want to import to the blank option.
-
Optionally choose a group to apply to every imported contact, or create a new group from here.
-
Select Import. A result summary appears with the number of contacts imported, updated, and skipped, and the reason for each skip.
-
Select Close.
Important: Phone numbers must include the country code, without a plus sign or spaces — for example 919876543210. Rows with an unreadable number are skipped.
Note: Importing matches on phone number. An existing contact is updated rather than duplicated.
To export leads
- Select Export. The export wizard appears.
- Choose the scope — all filtered leads, or only the leads you selected.
- Choose the columns to include. You can export name, phone, email, lead score, temperature, owner, stage, source, created date, AI summary, every category, and every custom field.
- Select Export. Zprox.Chat downloads a CSV file named
lead-studio-<date>.csv.
Note: The file is written with a UTF-8 byte-order mark so that Excel shows non-English characters correctly.
To run bulk actions
-
Select the checkbox on each lead you want to act on, or select the header checkbox to select the whole page.
-
If you want every matching lead, not just the visible page, select Select all n matching. A toolbar appears showing how many are selected.
-
Choose an action:
Action What it does Assign Assigns the leads to a team member, or unassigns them. Admin only. Add tag Applies a group to every selected lead, honouring the one-group-per-category rule. Set stage Moves the leads to a lifecycle stage. Auto-remind Turns the 24-hour window reminder on or off for the leads. Delete Deletes the leads. -
Confirm when Zprox.Chat asks. Large selections are processed in batches, and the result reports how many succeeded and how many failed.
Important: Deleting leads is permanent.
To broadcast to selected leads
- Select the leads you want to message.
- Select Broadcast. The broadcast dialog opens with your selection already loaded and only approved templates listed.
- Select a template, map its variables, and send. The steps are the same as in Broadcasts.
Note: Broadcast stays unavailable until you select at least one lead.
Message templates
WhatsApp requires an approved template for any message you send outside the 24-hour window. Build templates here, then submit them to Meta for review.
This section explains the following:
- To create a template
- To add a header
- To write the body and add variables
- To add a footer
- To add buttons
- To submit a template for approval
- Understand template statuses
- To edit or resubmit a template
To create a template
-
Select Templates in the sidebar. The Message Templates page appears.
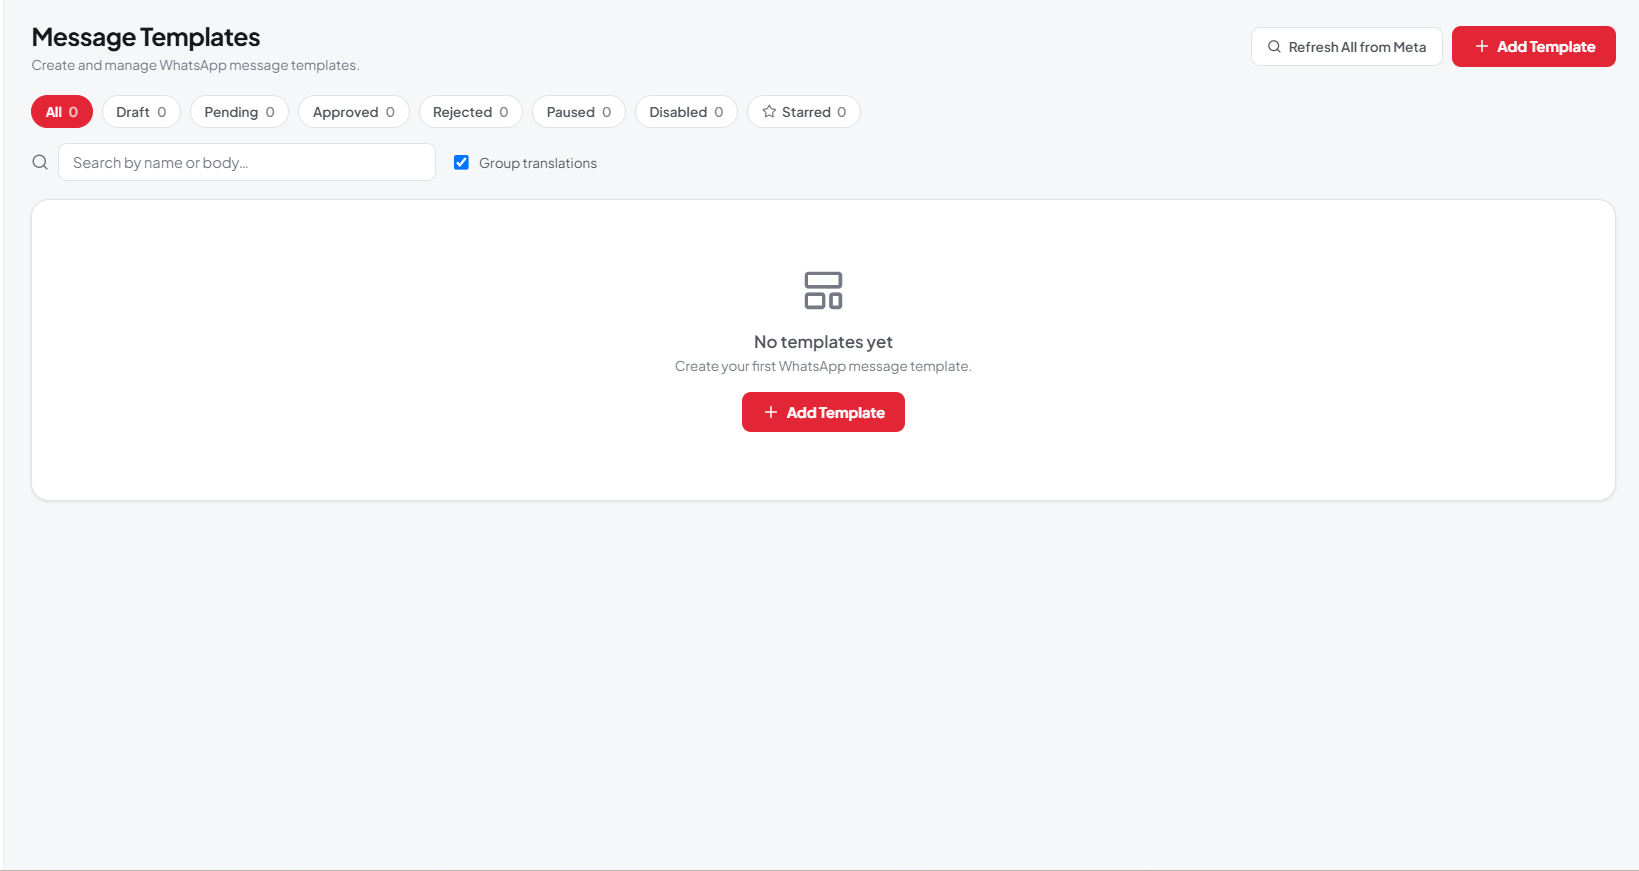 Figure 17. Message templates
 -
Select New template. The builder opens with a live WhatsApp preview on the right.
-
Complete Section 1 — Basic Information:
- WhatsApp Account — the business account this template is submitted to. You can't change it after submission.
- Template Name — lowercase letters and underscores only, up to 512 characters, for example
order_confirmation. Zprox.Chat converts spaces to underscores as you type. - Language — the language of the content, for example English, Hindi, or Tamil.
-
Complete Section 2 — Category. Choose one:
Category Use it for Marketing Promotions, offers, announcements. Utility Order updates, delivery alerts, account notices. Authentication One-time passwords and verification codes. Note: Authentication templates have strict rules — no media headers, OTP buttons only, and the footer may contain only a code-expiry time.
To add a header
The header is optional and appears above the message body.
-
In Section 3 — Header, choose a type:
Type What it does None No header. Text A single line of text. It may contain one variable. Image An image at the top of the message. Video A video at the top of the message. Document A file such as a PDF. -
For Text, type the header line.
-
For Image, Video, or Document, upload the sample file. Zprox.Chat uploads it to Meta and stores the media handle.
Important: Media headers need the Meta App ID on the connected WhatsApp account. If it's missing, add it in Settings > WhatsApp Accounts. See To connect manually with Cloud API credentials.
To write the body and add variables
-
In Section 4 — Body (Message Content), type your message. The limit is 1024 characters and a counter shows how much you've used.
-
Use the formatting buttons, or type the markers directly:
*bold*_italic_~strikethrough~
-
To personalise the message, insert variables as
{{1}},{{2}}, and so on, in order. For example:Hello {{1}}, your order {{2}} has been confirmed!Your delivery is expected by {{3}}. 🎉 -
Under Sample Values for Variables, type a realistic example for each variable. Meta requires this and rejects templates with missing or unrealistic samples.
Note: For an Authentication template, the body follows Meta's fixed pattern, such as {{1}} is your verification code.
To add a footer
The footer is optional, appears in small grey text, and can't contain variables.
-
In Section 5 — Footer, type the footer text. The limit is 60 characters.
Example:
Reply STOP to unsubscribe -
For an Authentication template, set the code-expiry time instead, between 1 and 90 minutes.
To add buttons
-
In Section 6 — Buttons, select the button type you want:
Button What it does Limit Quick Reply The customer taps to send a fixed reply. — Visit Website Opens a URL. The URL can end in a variable. Up to 2 Call Phone Dials a number. 1 Copy Coupon Code One-tap copy of a promo code. 1 OTP / Copy Code Auto-fills a one-time password. Authentication templates only. 1 -
Type the button label. Labels are limited to 25 characters.
-
For Visit Website, type the URL, for example
https://example.com/orders/ORD-12345. -
For OTP / Copy Code, choose Copy Code or One Tap (Android). For One Tap, also supply the Package Name and Signature Hash.
-
To remove a button, select the remove icon on its row.
To submit a template for approval
- Review the preview on the right. It shows exactly what the customer sees.
- Select Save to keep a draft, or Submit to send it to Meta.
- Zprox.Chat validates the template first. Fix anything shown in red, then submit again.
Note: Meta usually reviews a template within minutes, but it can take up to 24 hours. Zprox.Chat updates the status automatically.
Understand template statuses
| Status | Meaning |
|---|---|
| DRAFT | Saved in Zprox.Chat, not sent to Meta. |
| PENDING REVIEW | Submitted and waiting for Meta. |
| APPROVED | Ready to use in chats, broadcasts, automations, and store notifications. |
| REJECTED | Meta declined it. Open the template to read the reason, edit it, and resubmit. |
| PAUSED | Meta paused the template because of poor quality or user feedback. |
| DISABLED | Meta disabled the template. It can't be used. |
A quality badge — Green, Yellow, or Red — shows how customers are reacting to the template.
To filter the list: Select All, Draft, Pending, Approved, Rejected, Paused, or Disabled. Select the star icon to show only starred templates, or use the Search by name or body box.
To edit or resubmit a template
-
Select the template in the list.
-
Make your changes.
Note: You can't change the name or the WhatsApp account of an approved template.
-
Select Submit to send the new version to Meta. The template returns to PENDING REVIEW.
Broadcasts
A broadcast sends one message to many contacts on one WhatsApp number.
This section explains the following:
- To create a broadcast
- To map template variables
- To send a test message
- To choose recipients
- To save a draft or send
- To review a broadcast report
- To delete a broadcast
To create a broadcast
-
Select Broadcast in the sidebar. The Broadcast Messages page appears with your campaign history and totals for recipients, sent, delivered, replied, failed, and estimated Meta cost.
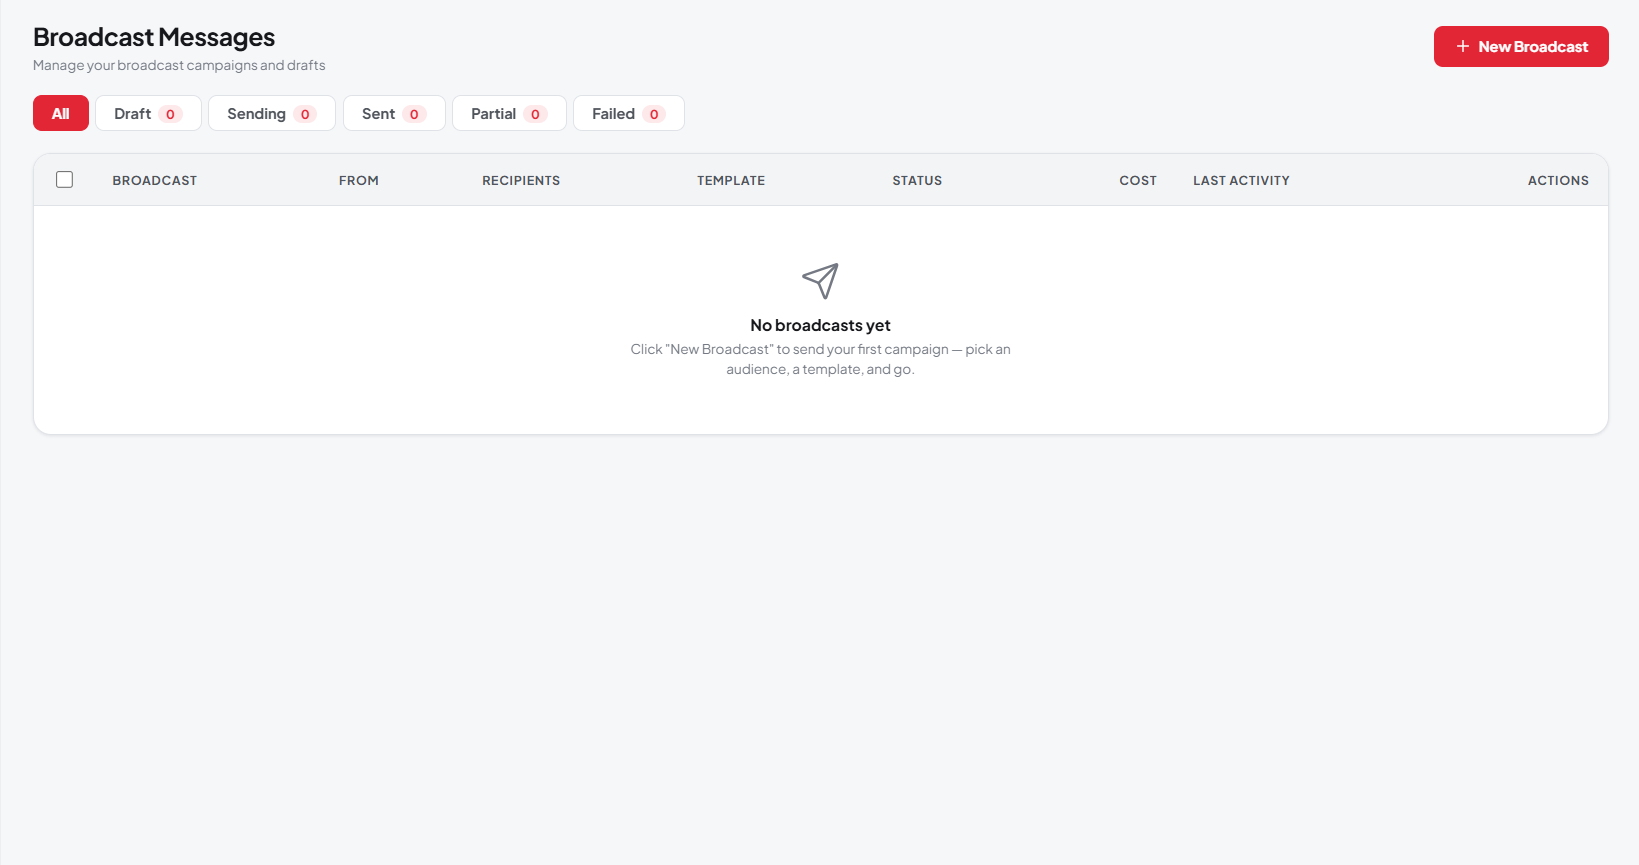 Figure 18. Broadcast messages
 -
Select New Broadcast. The dialog opens with a form on the left and a live preview on the right.
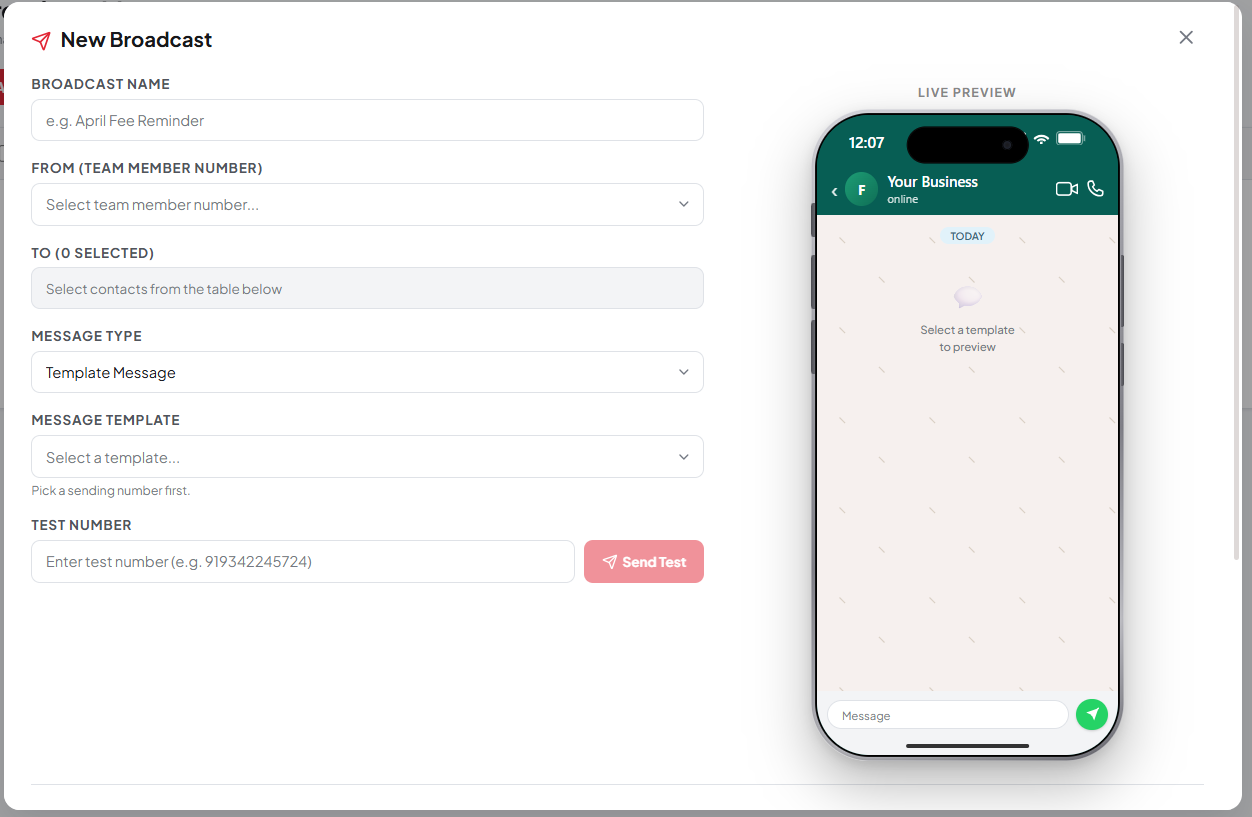 Figure 19. New broadcast
 -
In the Broadcast Name box, type a name you'll recognise later, for example
April Fee Reminder. -
Select the WhatsApp number to send from.
-
Select a Message type:
Type When to use it Template Message Any campaign to contacts outside the 24-hour window. This is the normal choice. Text Message Only reaches contacts who messaged you within the last 24 hours. -
For a template, select one from the list of approved templates. For text, type the message.
To map template variables
If the template contains variables, a mapping row appears for each one.
- For each variable, select where the value comes from:
- Contact Name
- Phone Number
- Any category, which supplies the contact's group in that category
- Any custom field
- Custom text… — then type a fixed value used for every recipient
- Check the preview. It resolves the variables using the first selected recipient, so you can see a real example.
Important: Every variable must be mapped. An unmapped variable stops the broadcast from sending.
To send a test message
- In the Enter test number box, type a number with its country code, for example
919342245724. - Select the test-send button. Zprox.Chat sends one message to that number.
- Check the message on the device before you send to everyone.
To choose recipients
- Scroll to the contacts table in the lower half of the dialog.
- Narrow the list:
- In the Search contacts box, type a name or number.
- Select All groups to filter by group.
- Select All stages to filter by lifecycle stage.
- Select the checkbox on each contact, or select the header checkbox to select everyone in the filtered list.
- Check the n selected count. To start again, select Clear.
To save a draft or send
- Select Save as Draft to keep the broadcast without sending it. You can open it again later from the list.
- Select Send to start sending. The broadcast moves to SENDING and then to SENT, PARTIAL, or FAILED.
Important: Sending can't be undone, and each message is billed by Meta. Send a test message first.
Note: Broadcasts count against your plan's monthly campaign-message quota. If you're over the limit, Zprox.Chat shows an upgrade prompt instead of sending. See Understand plan limits.
To review a broadcast report
- In the broadcast list, select the campaign. The report opens.
- Review the totals at the top: recipients, sent, delivered, replied, failed, and estimated cost.
- Use the tabs to filter the recipient list by All, Delivered, Failed, or Pending.
- Select a failed recipient to read the error Meta returned.
Per-recipient states are Pending, Sent, Delivered, Read, and Failed.
Note: Sent means Meta accepted the message. Delivered means it reached the device. The two counts differ while delivery receipts are still arriving.
To delete a broadcast
- In the broadcast list, select the bin icon on the campaign row.
- Read the confirmation and select Delete.
Important: Deleting a broadcast removes its report and its per-recipient history.